
By cantarelos music
If you are tired of sterile VST reverbs and looking for a shimmer that sounds like a haunted industrial hall, this project is for you. We are building a „Plate“ Reverb using affordable materials from the hardware store. It’s not a Lexicon, and it’s not meant to be—it’s an electromechanical instrument designed for experimental textures and metallic grit.
The Concept
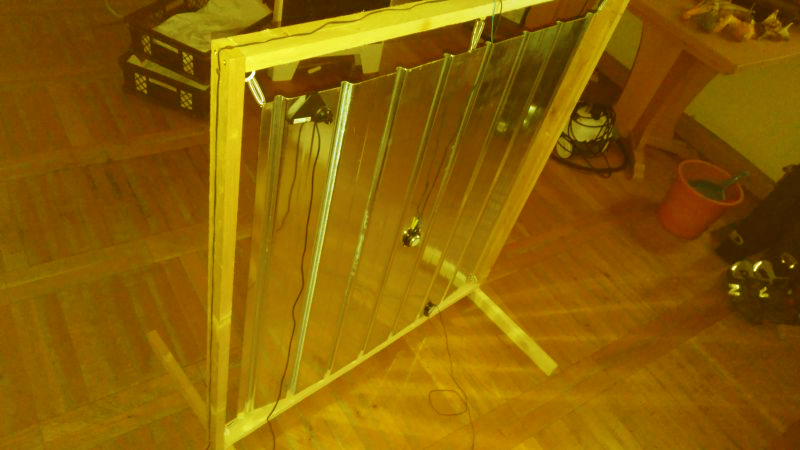
Most professional plate reverbs use a massive, flat steel sheet. We are breaking the rules by using a Trapezoidal Roofing Sheet. The ridges change the way sound waves propagate through the metal, resulting in a complex, dense, and slightly „trashy“ reverb tail that is perfect for industrial, ambient, or lo-fi productions.
Shopping List & Tools
Hardware Store Materials:
- Wooden Slats: (e.g., 2x50x200 cm) for the frame.
- Corrugated Trapezoidal Sheet: (100×100 cm, galvanized steel or aluminum).
- 4 Tension Springs: With loops/eyes.
- 4 Eye-Bolts/Hooks: With wood thread.
- Metal Brackets & Wood Screws: For frame stability.
- Machine Screws & Nuts: To mount the transducer.
Electronics:
- 1 Surface Transducer (Exciter): 20W to 30W (This „plays“ the audio into the metal).
- 2 to 6 Piezo Pickups: (These „capture“ the vibrations).
- Mono Jack Sockets: (6.35mm / 1/4 inch).
- Hook-up Wire & Electrical Tape.
Tools:
- Cordless Drill & Metal Drill Bits.
- Soldering Iron.
- Screwdriver.
Step-by-Step Construction
1. The Heavy-Duty Frame
Build a square wooden frame with an inner dimension of 110 x 110 cm. This ensures a 5cm gap on all sides for the 100×100 cm plate.
- Stability: Screw short pieces of the slats to the bottom corners as „feet“ so the frame stands vertically.
- Bracing: Use metal brackets to ensure the frame doesn’t warp under the tension of the springs.
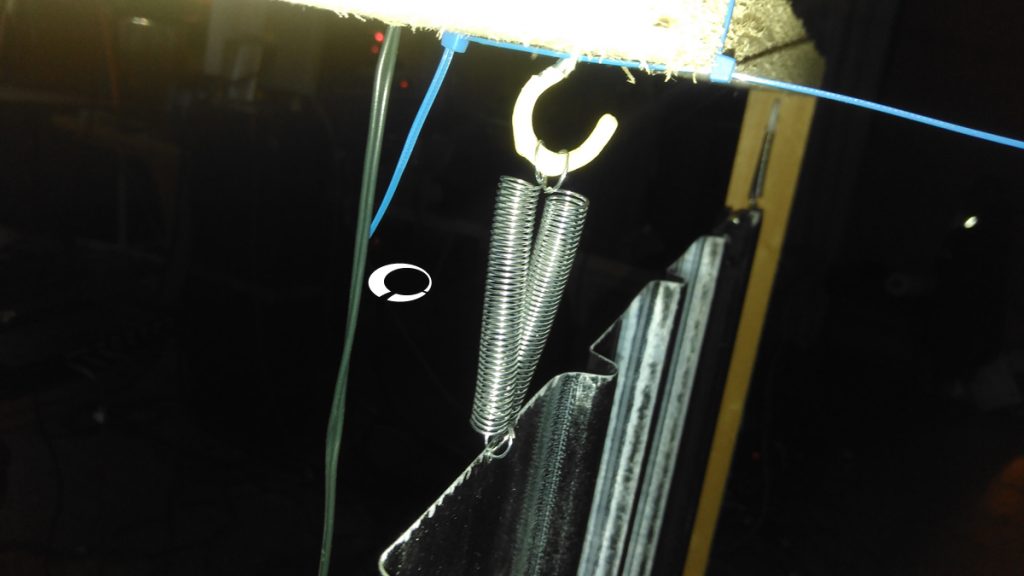
2. Suspending the Plate
The goal is to let the plate float so that vibrations don’t escape into the floor.
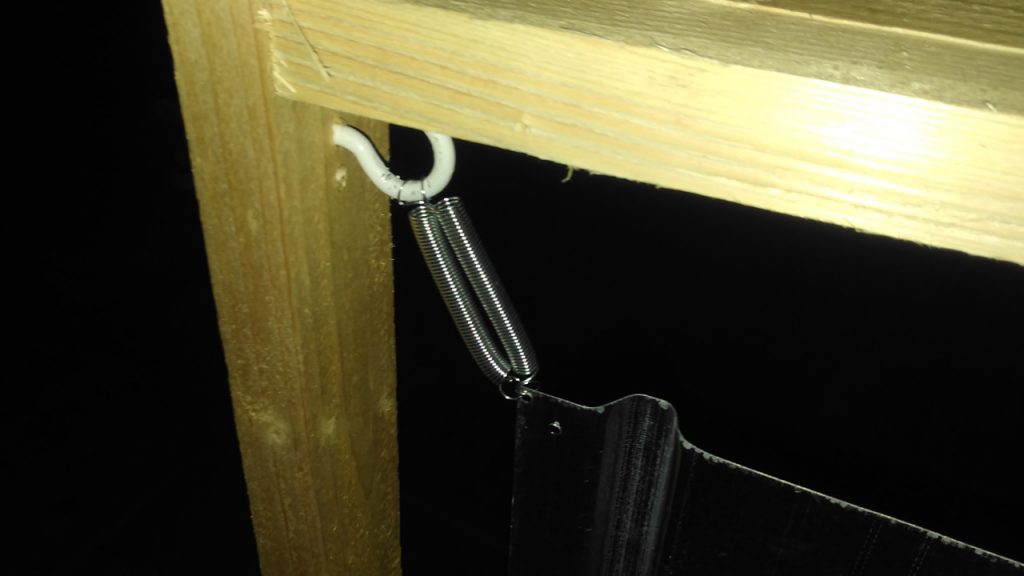
- Drilling: Drill one hole in each of the four corners of your trapezoidal sheet.
- Hooks: Screw the 4 eye-bolts into the inner corners of the wooden frame.
- Tension: Attach the springs between the frame hooks and the holes in the plate. The plate should now hang freely in the center of the frame. It should „ring“ when you tap it.
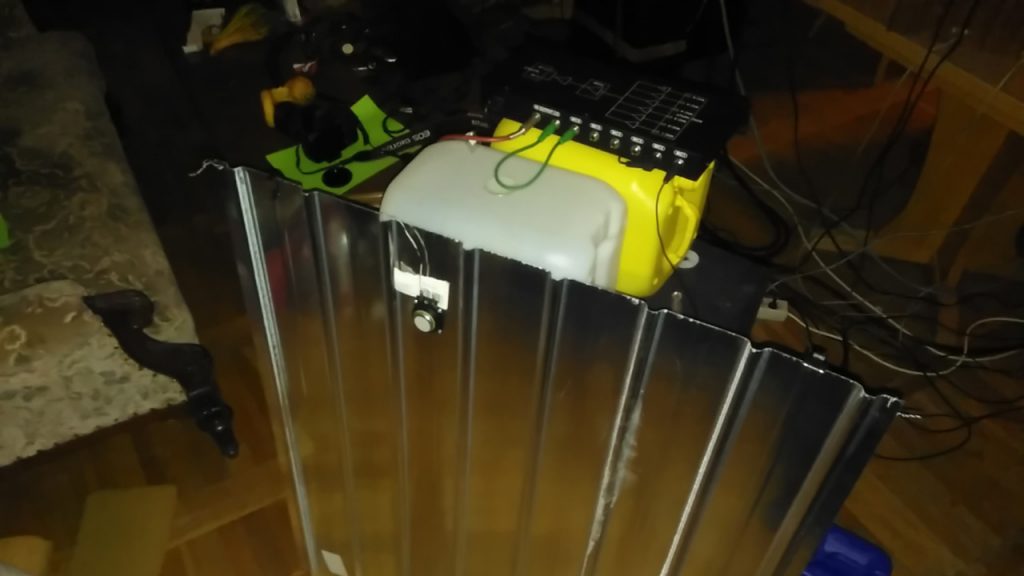
3. The „Voice“ (Input)
We use a surface transducer (exciter) to turn the plate into a speaker.
- Drill a hole in the middle (or an off-center position for a different character) of the plate.
- Bolt the Transducer firmly to the metal.
- Note: You will need to send your „Reverb Send“ signal from your mixer into a small power amplifier (like a cheap Class-D amp) to drive this transducer.
4. The „Ears“ (Output)
Instead of one microphone, we use multiple Piezo Pickups.
- Tape the Piezos to different spots on the plate using strong adhesive tape.
- Because the trapezoidal sheet has ridges and valleys, every position sounds different.
- Pro Tip: Place two Piezos on opposite sides for a wide (though phase-coherent) stereo-ish effect.
5. Wiring & Final Touches
- Mount a small wooden board to the side of the frame to hold your jack sockets.
- Solder the wires from the transducer and the piezos to these jacks.
- Keep your wiring neat with tape to avoid „rattling“ against the frame.
How to use it in your Mix
- Send: Auxiliary Send -> Small Amp -> Transducer.
- Return: Piezos -> Mixer Inputs (Use high-gain/Hi-Z inputs if possible).
The Magic of Multi-Tracking: Since you have up to 6 Piezos, don’t just use one. Bring them all into your mixer on separate channels. Each Piezo captures a different frequency resonance of the trapezoidal sheet. By mixing these signals, you can „thicken“ the reverb tail or EQ the „metal“ out of specific channels to create a dense, shimmering atmosphere.
Don’t expect a pristine hall. This device is alive. It hums, it rings, and it has a soul. It is a physical object that reacts to your music. For experimental sound design, it’s an absolute goldmine.
Happy Building! Let us know how your „Trapezoidal Reverb“ sounds!
Building on your DIY Plate Reverb, the leap from a „science project“ to a studio-ready tool often lies in the impedance matching and shielding. Piezos are high-impedance devices; if you plug them directly into a line input, they will sound thin (no bass) and act like giant antennas for hum.
Here is the technical follow-up in English, designed for a blog or forum.
Part 2: Taming the Noise – Pre-Amps & Hum Reduction
If you’ve connected your Trapezoidal Plate Reverb and noticed it sounds „tinny“ or suffers from a constant 50/60Hz hum, don’t worry—that’s normal for high-impedance (Hi-Z) DIY builds. Here is how to fix it with a simple Pre-Amp circuit and a grounding strategy.
1. The Simple „Buffer“ Circuit
Piezos need a high input impedance (at least 1–10 $M\Omega$) to capture the full frequency range of the plate. Without a buffer, you lose all the beautiful low-end resonance.
The Schematic Concept (JFET Buffer):
You can build a simple „JFET Buffer“ using a single transistor (e.g., J201 or 2N5457).
- Components: 1x JFET Transistor, 1x 10 $M\Omega$ Resistor (Input), 1x 10 $k\Omega$ Resistor (Source), 1x 10 $\mu F$ Capacitor (Output).
- Power: 9V Battery (cleaner than a cheap power supply).
- Result: This converts the weak, high-impedance Piezo signal into a strong, low-impedance signal that your mixer loves.
Pro Tip: If you don’t want to solder a circuit, use a DI Box with a high-impedance input or a cheap Acoustic Guitar Pre-amp pedal for each Piezo.
2. Reducing Hum and Interference
Since your metal plate is basically a massive antenna, it will pick up electromagnetic interference (EMI) from your lights, computer, and monitors.
A. The „Grounding the Shield“ Method
The most important step is to turn the plate itself into a shield.
- Ground the Metal Plate: Take a wire and connect it from the metal plate (use a screw/washer) directly to the ground/sleeve of your output jacks.
- Shielded Wiring: Use „shielded“ audio cable (coaxial) for the run between the Piezos and the jacks. Do not use simple copper wire for long distances.
B. The „Hum Destroyer“ Circuit (Differential Pair)
If you are using two Piezos, you can wire them in a Pseudo-Balanced configuration to cancel out hum:
- Wire Piezo A to the „Hot“ (+) of your XLR or TRS jack.
- Wire Piezo B (flipped upside down) to the „Cold“ (-) of the jack.
- Interference that hits both Piezos simultaneously will be cancelled out by the phase inversion, while the mechanical vibration (which hits them slightly differently) remains.
3. Mechanical Hum (Isolation)
Sometimes „hum“ isn’t electrical—it’s the sound of your building!
- Soft Mounting: Ensure your wooden frame sits on rubber pucks or old carpet.
- Tension Check: If the springs are too tight, they can transmit vibrations from the frame to the plate. They should be just tight enough to keep the plate from sagging.
Summary of the „Silent“ Build:
- Piezo -> Shielded Cable -> JFET Buffer -> Mixer.
- Plate -> Earth/Ground.
- Exciter -> Separate Power Supply (keep the amp power away from the Piezo lines).
With these steps, your experimental reverb will move from „noisy junk“ to a „boutique lo-fi processor.“ It will still have its unique, dark character, but without the annoying buzz of the modern world.